Anycubic Photon Workshop
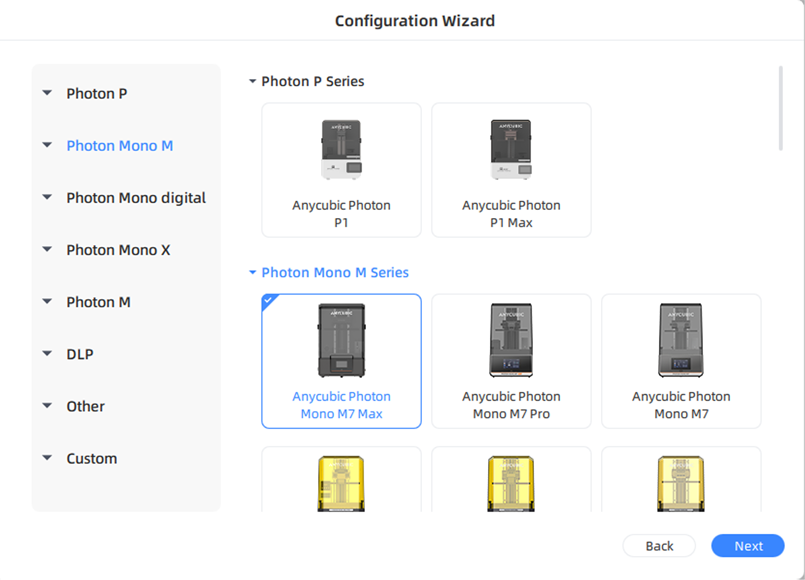
That’s the initial setup wizard—start there.
- Continue to the printer selection screen.
- Select Anycubic Photon Mono M7 Max.
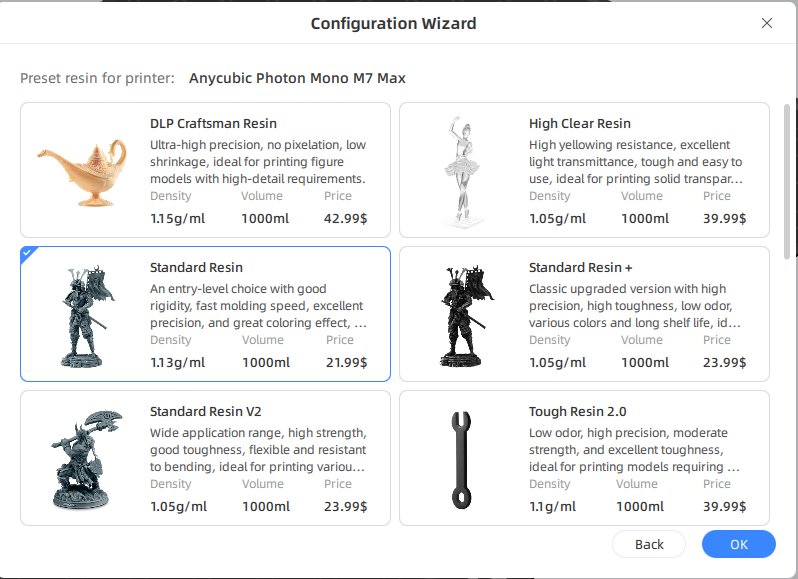
Select Standard Resin, then click ok whichever appears.
If your bottle says Standard Resin V2, choose that specific option instead. The exposure settings in the guide are for V2.
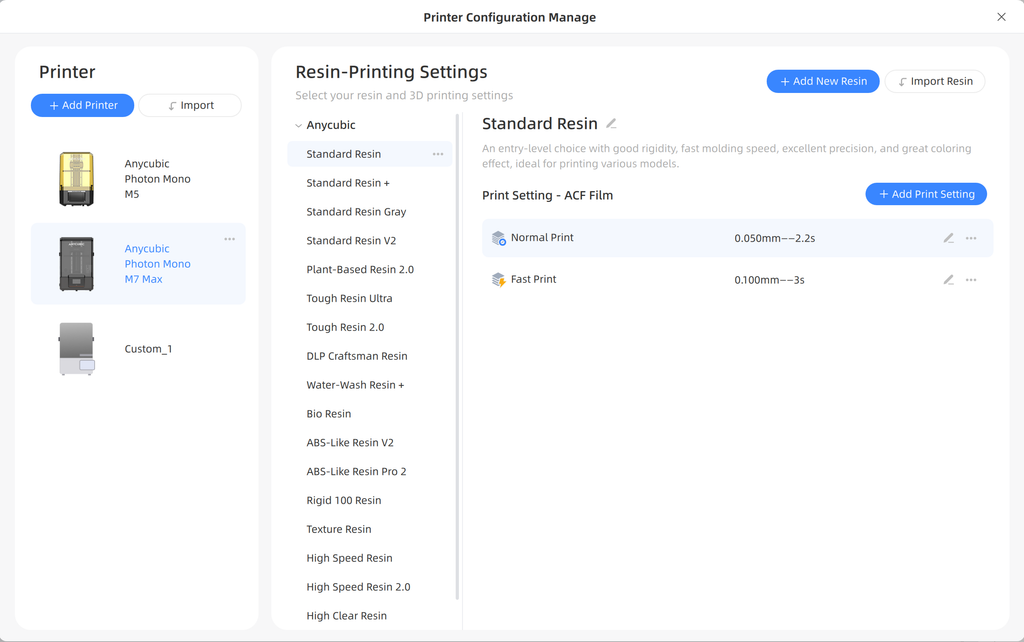
Changing resin, exposure time, and layer height
Click the area labelled Normal Print on the right-hand side of Photon Workshop. This opens the Printer Configuration Manager, where you can add a printer or select a different resin.
To edit your resin settings:
- Select your resin type, such as Standard Resin.
- Click the pencil icon to the right of the resin name.
- Increase or decrease the normal exposure time as needed.
- Adjust the layer height. The default shown is 0.05 mm; use 0.01 mm only if supported by your M7 Max profile and software version.
- Save or apply your changes, then slice the model again.
Smaller layer heights produce thinner layers and generally increase printing time. Recheck exposure with a calibration print after changing layer height.
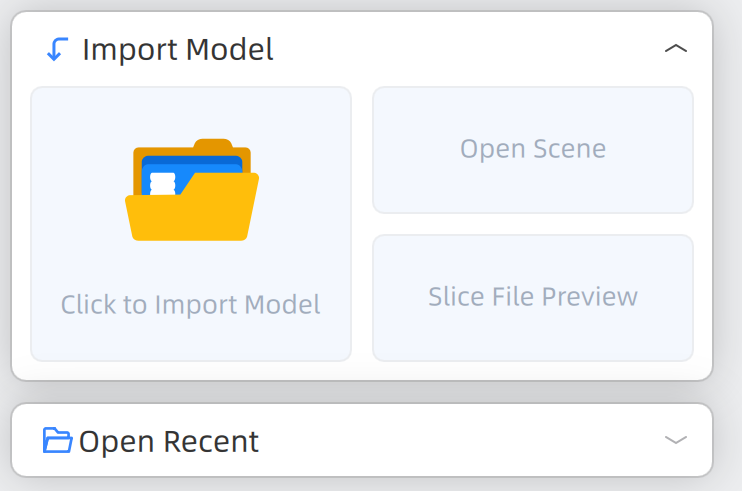
Click Open / Import Model and load your STL or OBJ.
Check the displayed dimensions before proceeding. Use uniform scaling when you need to preserve proportions, then run Repair if the model has mesh errors. Inspect the result to ensure intended openings remain intact.
Hollow larger models and add openings
Small models may be simpler to print solid. For larger models, use Hollow to reduce resin consumption and weight, then Punch to create openings.
Every hollow cavity needs access for draining and cleaning. Position openings to relieve suction during printing and allow resin to escape afterwards. Check in the layer preview that holes pass through the wall and that no sealed pockets remain.
Choose wall thickness and hole size for the model’s dimensions and resin; the screenshot’s values are examples. Anycubic hollowing and hole guidance
Open Support, choose an appropriate support preset, and generate automatic supports. Use the model-lift setting to leave space between a supported model and its raft.
Inspect from below and add manual supports at missed overhangs and weak starting points. Pay attention to fingers, weapon tips, thin edges, and the first parts of the model to print.
Larger contacts improve holding strength but leave larger marks. Automatic supports still need inspection. Official support guide
Slice and check islands
Save an editable project, then click Slice. In the preview, run Check Islands and move through the layers.
An island is a section that begins without attachment to previously printed material.
In Anycubic’s illustrated interface, red marks unsupported regions and yellow flags potentially problematic connections. Return to preparation, correct supports or orientation, and slice again. Also inspect drainage openings and abrupt changes in layer area. Island-check instructions
Export and print
Export the sliced file for the M7 Max; its supplied print files use .pm7m. Copy it to a compatible USB drive, safely eject the drive, and select the file on the printer. An STL alone is not the print-ready file. M7 Max downloads
Mix the resin as instructed by its manufacturer, fill without exceeding the vat’s maximum mark, and close the cover. Confirm the correct file and sufficient resin before starting. M7 Max startup instructions
.