3D Printing Quick Start Guide
1 – Get a File
You need an STL, OBJ or a 3MF file. These can be exported from your 3D modelling software of choice, such as Autodesk Fusion 360, Solidworks, Blender, etc.
- Exporting STL files from Fusion 360
- Exporting STL files from Solidworks
- Exporting STL files from TinkerCAD
Using Sketchup to design models for 3D printing is explicitly not recommended.
If you don’t have a particular design you want to print but want to learn the process, take a look at some of the design aggregator sites to find something that takes your interest. It’s recommended you start with something simple and straightforward – don’t print a 100-piece clockwork mechanism or a tiny, highly detailed figurine your first time around!
Once you have your STL file, save it somewhere you will be able to access from the Maker Space computers. This could be on the F drive, or on a USB disk.
2 – Choose a Printer
Come to the Maker Space and head straight in to the Print Hive. You’re looking for a printer that’s ready and waiting to be used, or has finished printing and can be made ready for use. Make sure the printer has a suitable build volume for the size of part you are trying to print – small parts can print on a large printer, large prints won’t fit on a small printer!
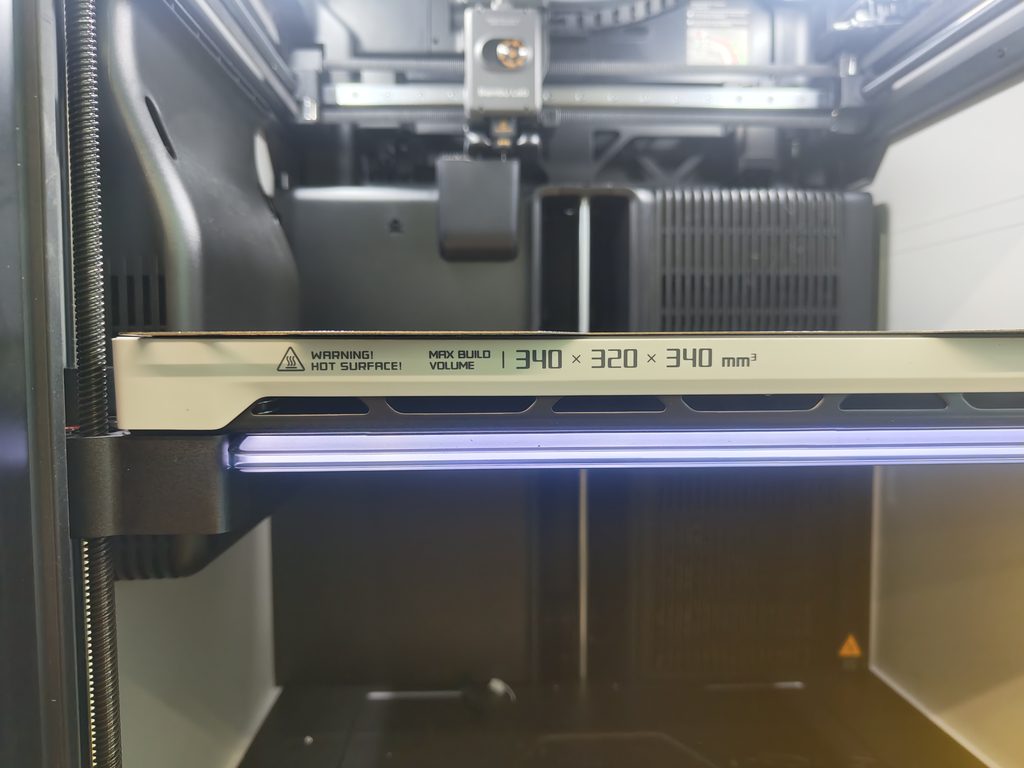
If you are unsure of the build volume, check the dimensions shown on the build plate.
Don’t stop, abort, or otherwise cancel a print that is already running unless there is an obvious error with the print (such as spaghetti!)
Don’t remove the SD card or USB drive from a printer in the middle of a print – it will cause the print to abort.
If you’ve found a printer you simply need to remove the storage.
Take the storage back to a PC in the CAD suite. The card readers are located on the front of the PC tower.
3 – Prepare For Printing
Before you can print a 3D model, you need to prepare it using slicing software. Simply copying an STL file onto an SD card is not enough. The slicer divides the model into layers and creates the instructions the printer needs to print it.
We use Bambu Studio to prepare files for our Bambu Lab printers. It is available through Apps Anywhere, or you can download and install it on your own PC or laptop to prepare your files at home.
- Open Bambu Studio through Apps Anywhere or from the Start menu if it is installed on your computer. It may take a few minutes to load.
- Follow the on-screen setup instructions and accept the licence conditions when prompted.
- Select the correct Bambu Lab printer model, nozzle size and build plate type. Make sure these match the printer you will use.
- If you are unsure of the build volume, check the dimensions shown on the printer’s build plate.
- Import your 3D model into Bambu Studio.
4 – Position Your Files
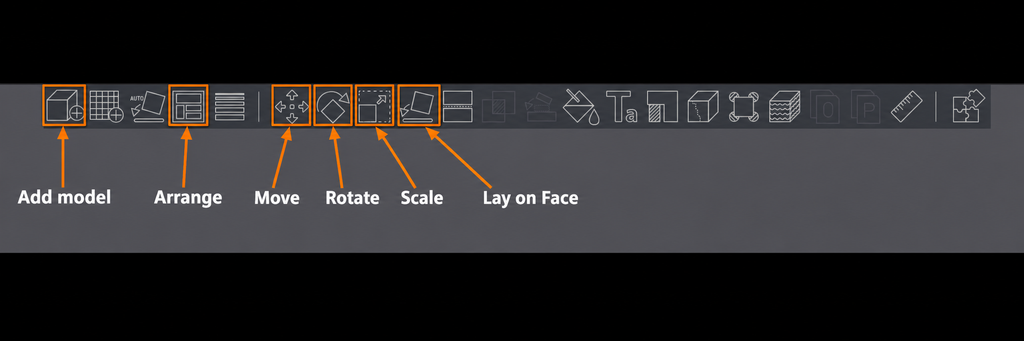
Before slicing, check that your models are the correct size, sit flat on the build plate and fit within the printable area.
- Check the size
Select your model and use the Scale tool to check its dimensions. Keep uniform scaling enabled if you want to resize it without changing its proportions. Avoid resizing parts that need to fit other components unless you know the required dimensions. - Move the model
Use the Move tool to position your model on the plate. For a single model, a position near the centre is a good starting point. Keep the whole model inside the printable area. - Choose the orientation
Use Rotate to change how the model will print. Choose an orientation with a stable base and as few unsupported overhangs as practical. - Place a flat face on the plate
Select Lay on Face, then click the face you want against the build plate. Check that the model rests flat and has enough contact with the plate to remain stable. - Arrange multiple models
Use Arrange to position several models automatically. Check the result and leave space between models for any supports or brims. If they do not fit comfortably, move some to another plate. - Slice and check the preview
Click Slice plate, then open Preview. Check the first layer, supports and any warnings before preparing the file for printing.
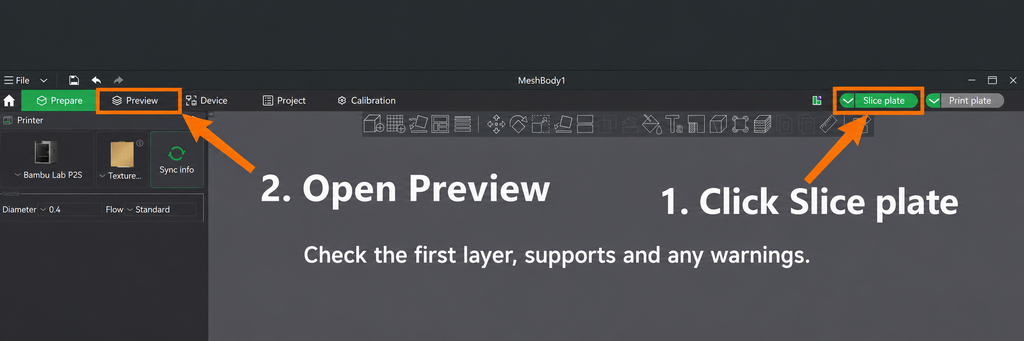
Remember: The model’s height must also fit within the printer’s build volume. The plate dimensions show the available footprint; check the selected printer’s specifications for its maximum print height.
Material Usage
We don’t charge for the fair use of 3D printing materials, but there are practical considerations. A full reel of material is 1000g, so using