Turning on the waterjet
Hazards



Instructions
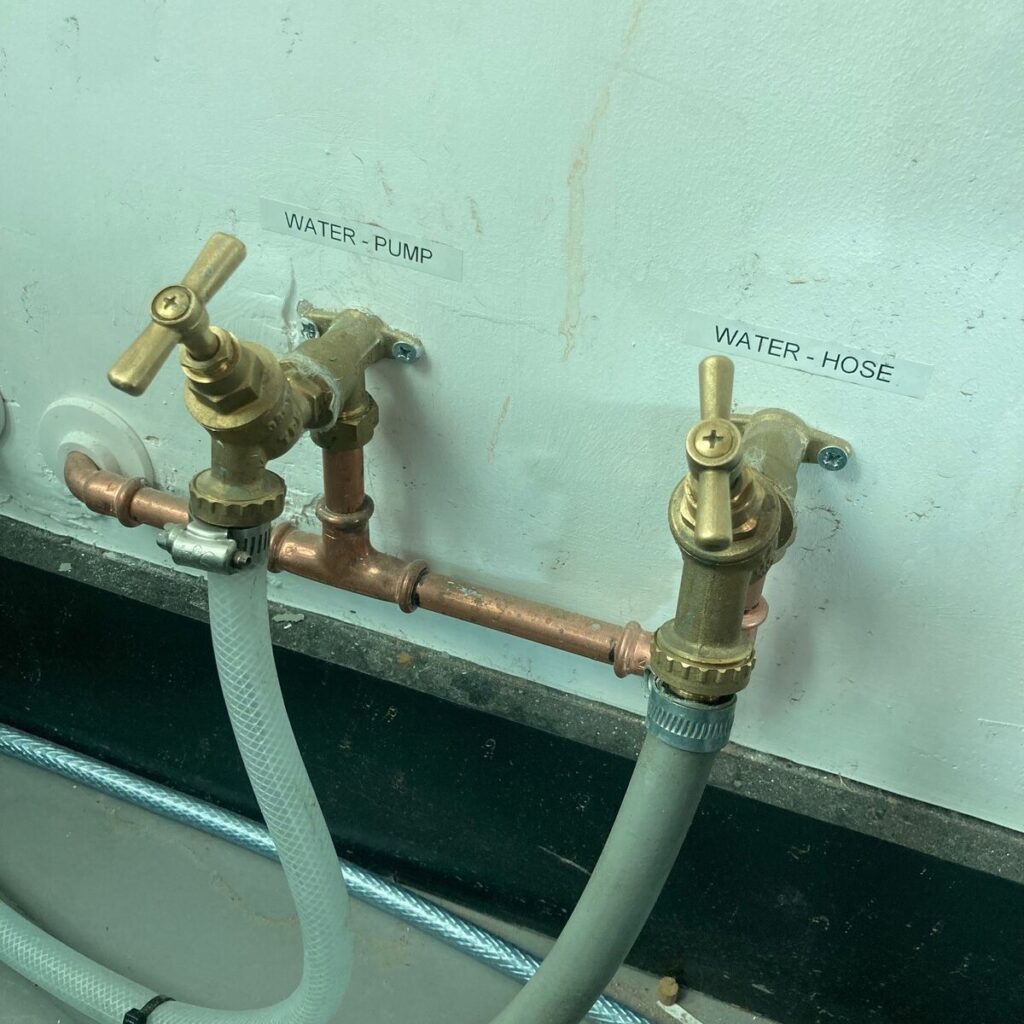
Turn on the wall mounted water valves (one for hose and one for pump). These are located in the far corner of the room behind the waterjet tank, at floor level.
Turn both water valves counter-clockwise until it will not turn any further.
DO NOT PROCEED UNTIL BOTH WATER VALVES HAVE BEEN TURNED ON, DAMAGE TO THE PUMP WILL OCCUR.
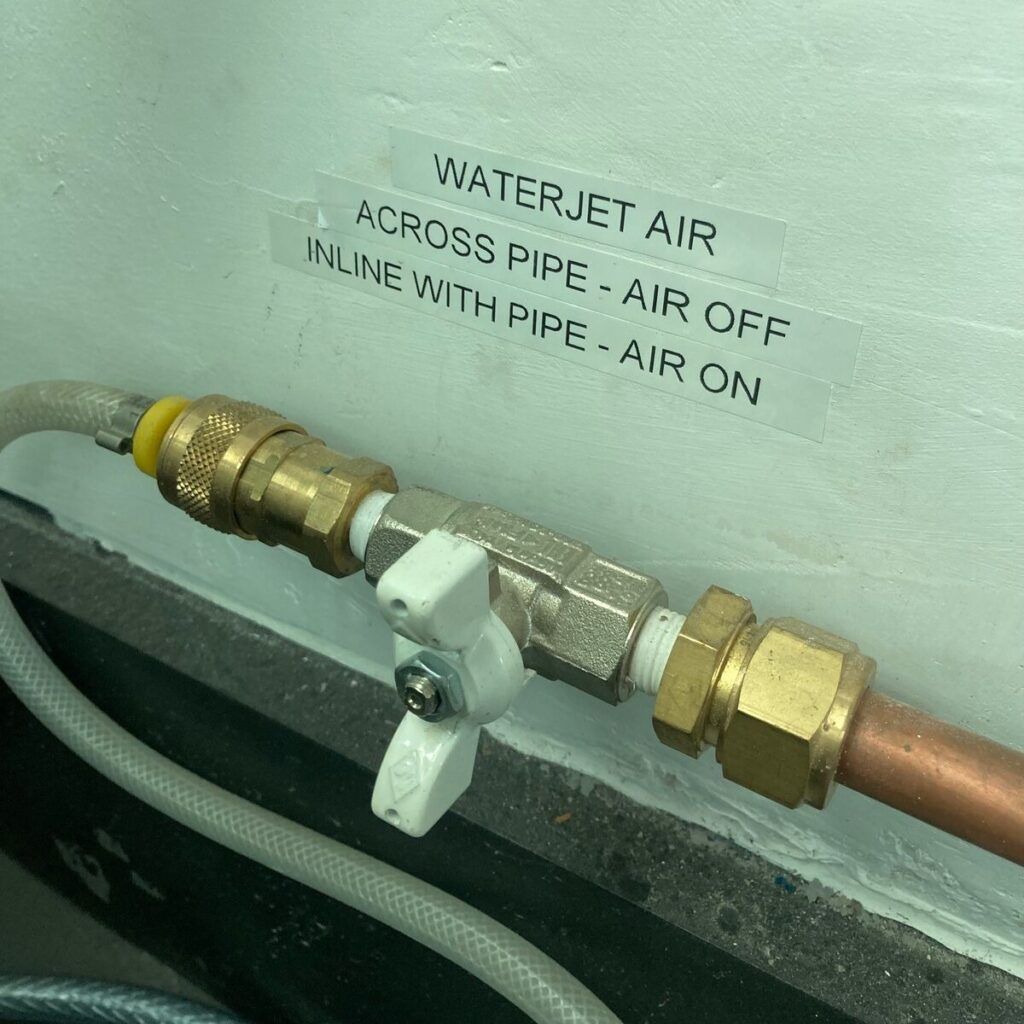
Turn on the wall mounted air supply valve. If the white handle is inline with the pipe the valve is in the “on” position.
In this photograph the valve is in the “off” position.
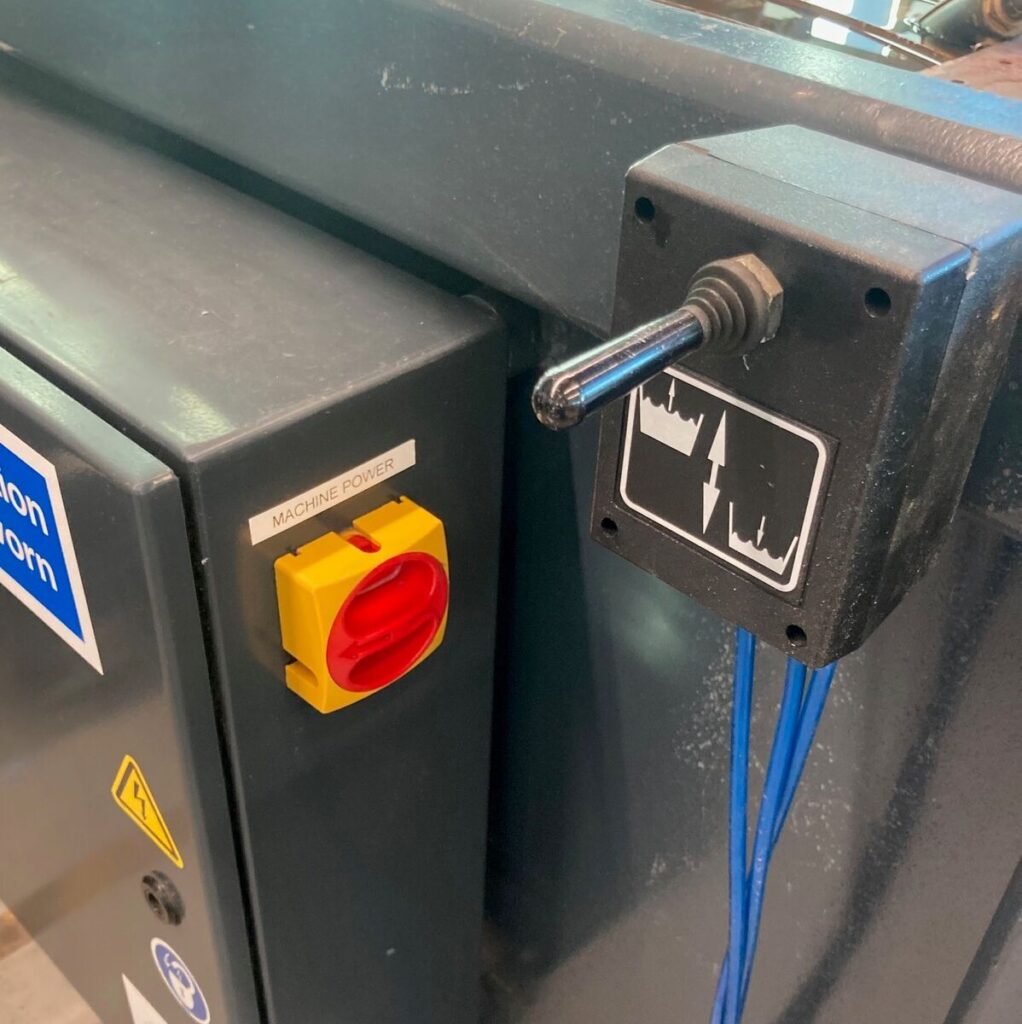
Turn on the rotary isolator for the machine power.
This switch is located on the side of the machine electrical cabinet, affixed to the side of the waterjet tank.
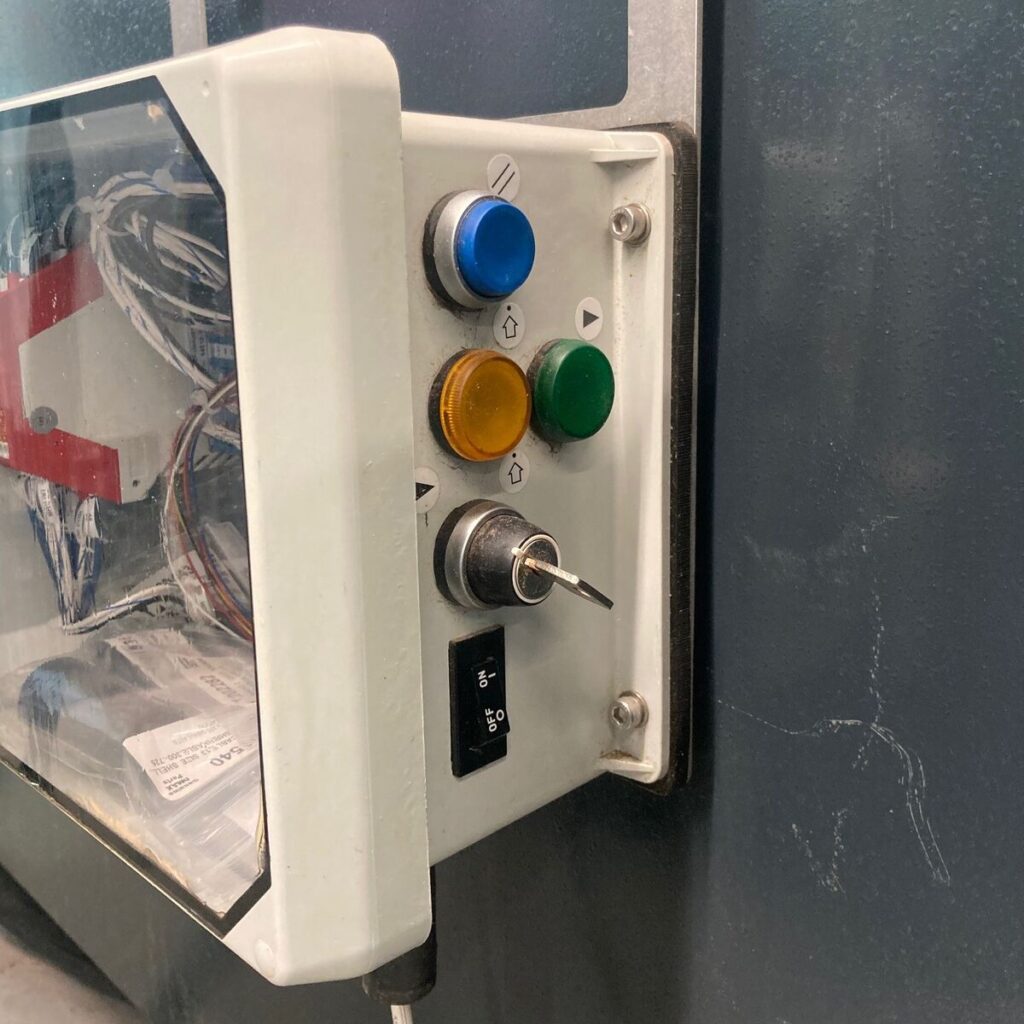
Press the blue button on the side of the transparent fronted box. The green light to the right should turn on.
This is located to the left of the machine electrical cabinet, on the side of the waterjet tank.
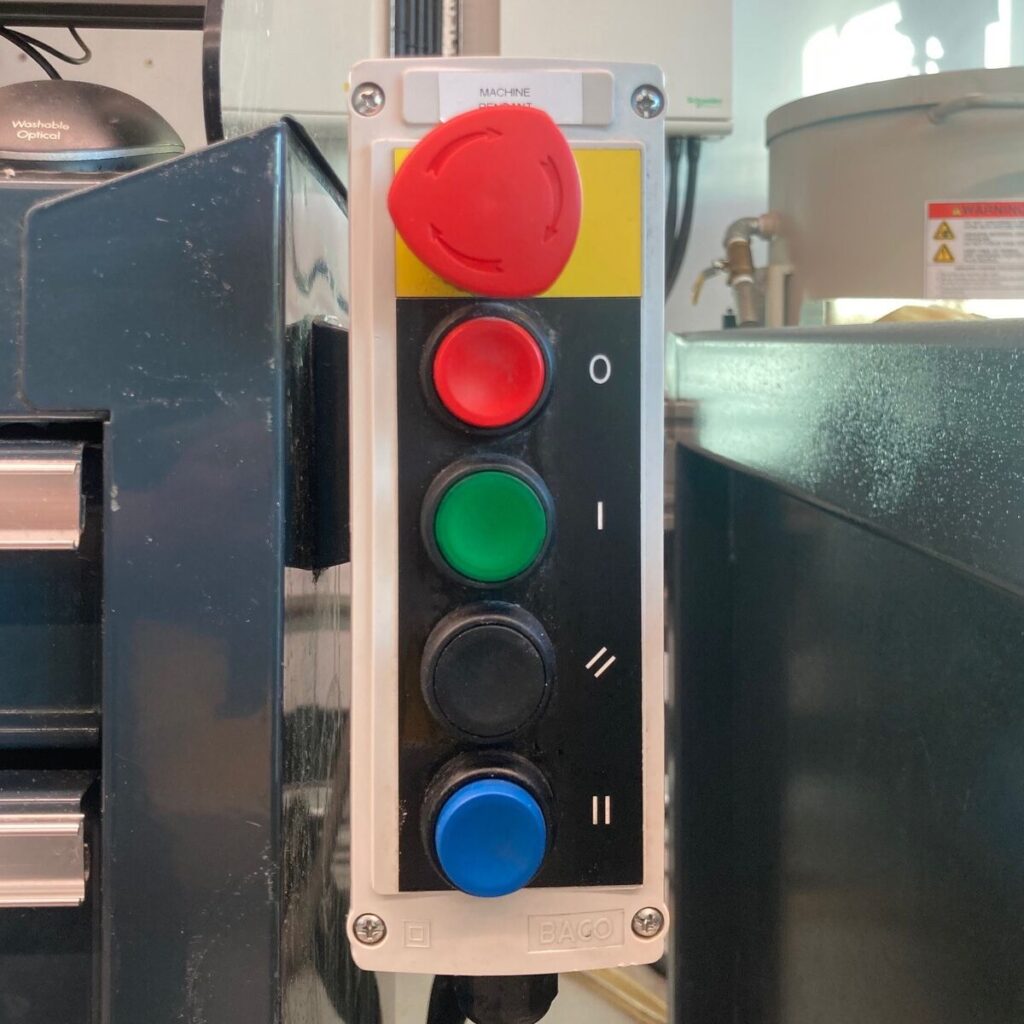
Press the green button on the machine pendant. This turns the machine power on. The button will light up green.
The machine pendant is attached to the side of the rolling cabinet containing the control computer.

The PC will start up when you turn on the machine power isolator. If it doesn’t, check the power switch on the monitor and the power switch on the PC mounted to the back of the screen.
Open OMAX Make using the shortcut on the desktop or in the Start Menu.
Position the head of the machine near the fixture home position, using the arrow keys on the keyboard as appropriate.
Make sure you raise the head to clear any obstacles using the “7” key on the numpad.
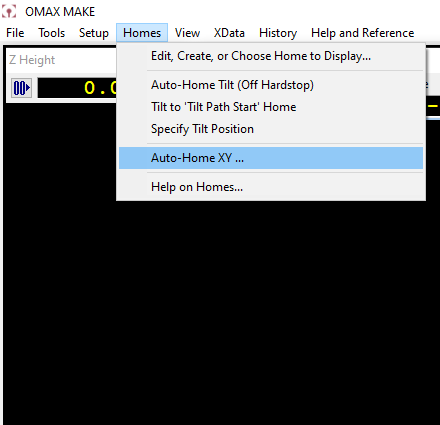
Select Homes > Auto-home X&Y from the menu bar. The machine will home itself in the corner closest to where you are standing when operating the machine.
Make sure the head will clear any obstacles that are in the way by raising the head when you are asked.
Using the arrow keys on the keyboard jog the machine approximately 50mm in the X and Y directions towards the centre of the waterjet tank.
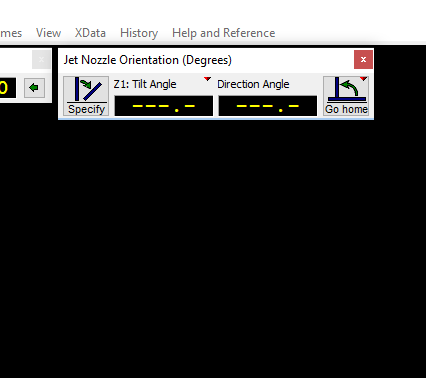
Select Go Home in the Jet Nozzle Orientation window. This will square and home the 5-axis head.
Remove the foam anti-splash muff and place to one side.
Jog the machine so that the nozzle is over clear water about 20mm above the surface of the water.
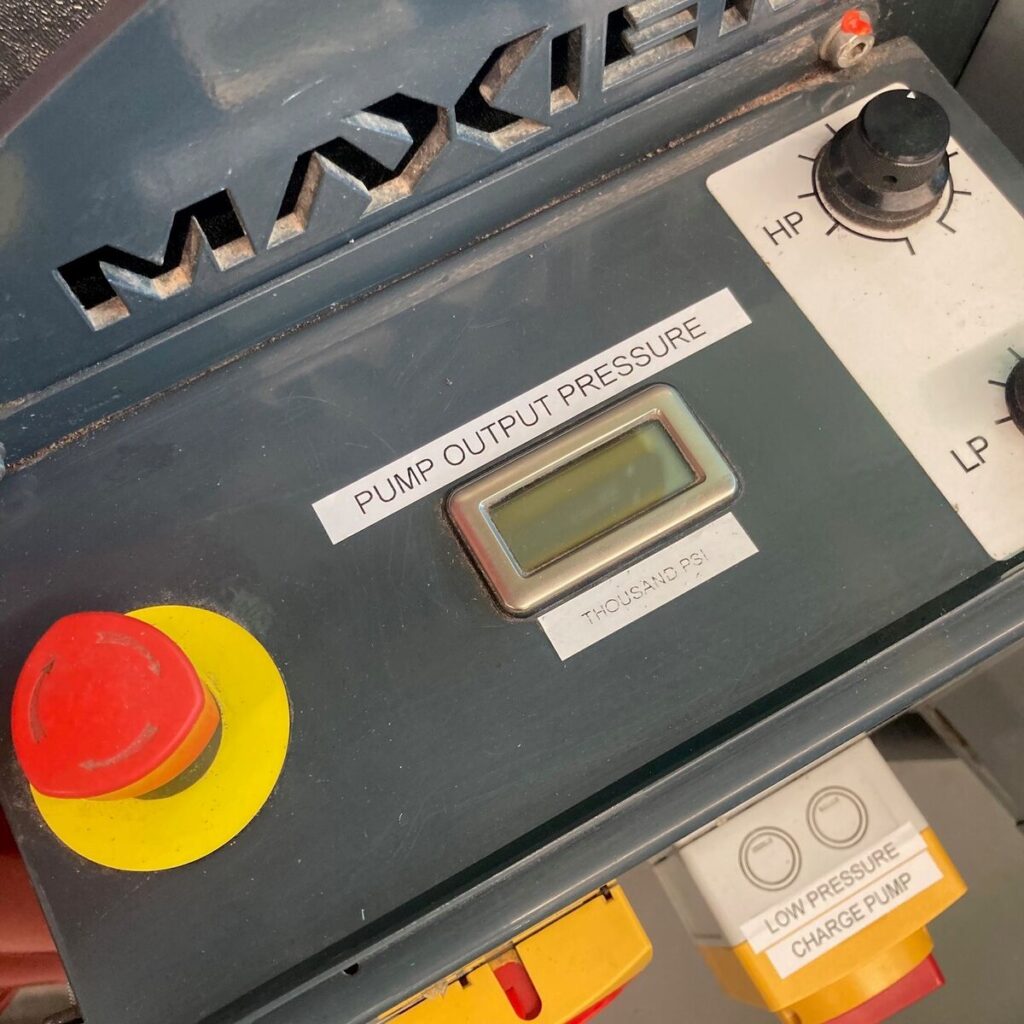
The pressure indicator on the VFD should read around 0.2.
If it reads 30.1 clear the error by pressing the RESET button on the front of the VFD, located underneath the display screen.
If the VFD needs to be continually reset stop work immediately. The filters may need to be changed. Ask a member of technical staff for help.
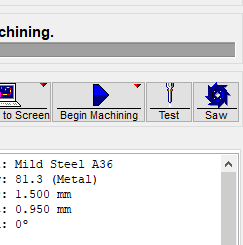
Select Test from the right hand tool bar.
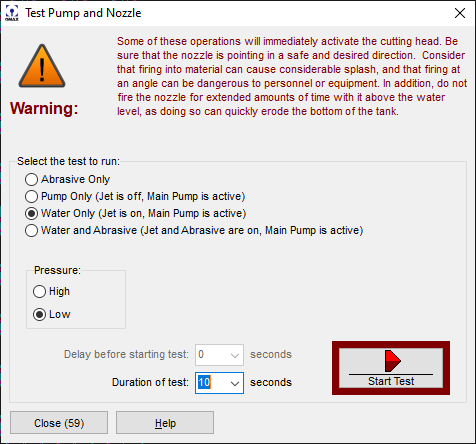
Select Test from the right hand tool bar.
Perform the following tests, running the pump for 10 seconds each.
- Water Only, Low Pressure
Check for 15,000 PSI on the VFD pressure gauge and a clean, straight jet of water from the nozzle. - Water Only, High Pressure
Check for 45,000 PSI on the VFD pressure gauge and a clean, straight jet of water from the nozzle. - Pump Only, High Pressure
Check for ~42,000 PSI on the VFD pressure gauge.
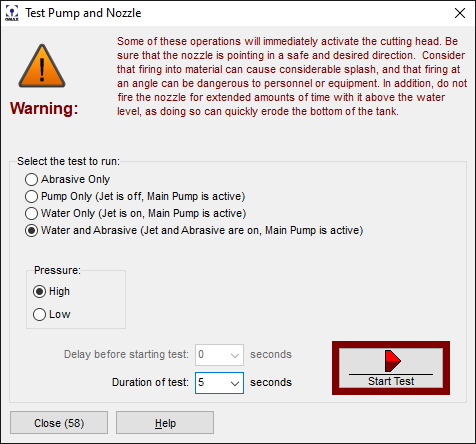
Run the Water and Abrasive test at high pressure for a maximum of 5 seconds.
This test is noisy, protect your hearing.
Verify that the abrasive is flowing through the feed tube into the nozzle. The jet will sound “angry.”
Close the Test window or let it time out.
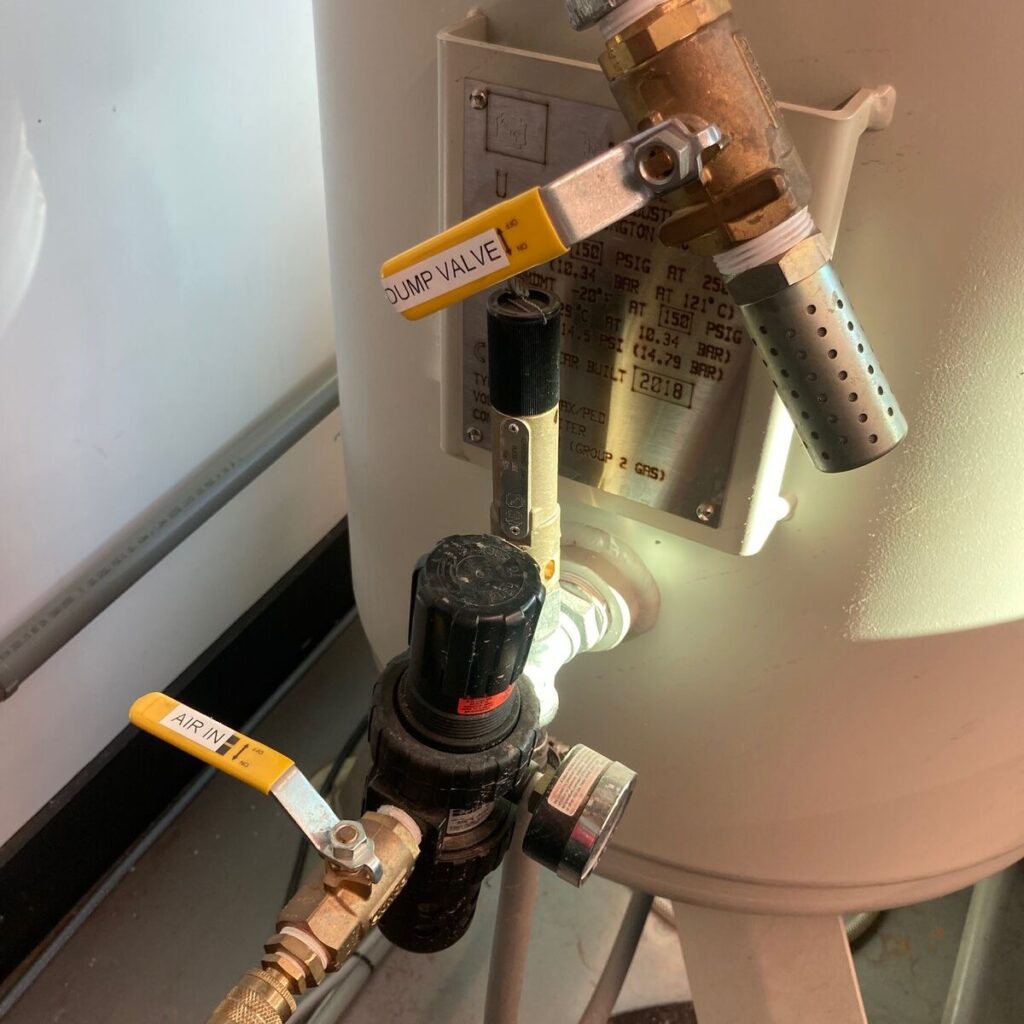
Remove the lid from the bulk abrasive hopper and place it to one side.
Check that the yellow valve labelled DUMP VALVE is closed and the hopper is pressurised.
If it isn’t, pull up on the hopper plug and open the yellow valve labelled AIR IN.
The waterjet is now ready to use.