Setting up the Heat Press
Different vinyl types need different heat and timer settings, and the exact value you need may vary depending on the complexity and style of your design. The settings below are a good starting point, and you can always press your design a second time if it hasn’t quite set right the first time.
Hazards
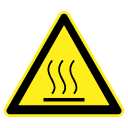
Hot Surface
There are extremely hot surfaces exposed during the typical operation of this machine. Extreme caution is to be used at all times. You may wish to wear heat-proof gloves when loading and removing mat

Heat Proof Gloves
Heat proof gloves (bright yellow and black, in the PPE cupboard) are available to be worn when loading and unloading material from the heat press. This is to protect against the heating surfaces and from potentially overheated materials.

Pinch Points and Entrapment Hazard
Ensure you do not become trapped in the machine when opening and closing the heat press platten. There are several points in the hinges where fingers may be caught.

Spring Loaded Handles and Platten
Make sure that you hold both handles firmly when opening and closing the heat press platten. The handles are spring loaded.
Setting the temperature and the timer
- Turn on the heat press by operating the power switch on the side of the control box.
- The heated plate will start heating up.
- Open the platten by firmly grasping the top and bottom handles. Pull the top handle upwards.
- Set the target temperature of the upper heat plate by entering the setting mode. The platten must be open for the temperature and time setting modes to operate.
- Press the MODE button once. The upper LED display will read “SP”. The lower LED display will show the target temperature for the heated plate.
- Adjust the target temperature up and down as required, referencing the materials table on the Make In Salford Wiki, the manufacturer’s Technical Data Sheet, or the information on the vinyl box.
- Press the MODE button once more. The upper LED display will read “St.”. The Lower LED display will show the number of seconds the timer will count down for once the heat press is closed and locked.
- Press the MODE button once more to enter the Centigrade/Fahrenheit setting mode. The machine must only be set to Centigrade (C) mode.
- The heated plate will continue to heat up. Once the TEMP LED has extinguished the heat press is ready to use.
- Do not leave the heat press unattended when it is turned on.
Starting heat and timer settings
| Vinyl Type & Colour | Temperature Settings | Timer Settings |
| Uniflex Nature White | 150 C | 15 s |
| Uniflex Nature Black | 150 C | 15 s |
| Uniflex Nature Red | 150 C | 15 s |
| Speedball Fabric Ink Heat Setting | 160 C | 40 s |
Setting the pressure plate
The pressure plate that compresses the workpiece is adjustable by the large black knob on the top of the machine. There is a fine balance between “not enough pressure” and “so much pressure I can’t physically close the press”. The easiest way is to adjust it to snug while closed, and then to turn another half turn clockwise once open again.
You should do this when the heat press is cool.
- With the heat press off and in the “open” position, turn the black pressure knob in the middle of the upper platten anti-clockwise until it stops.
- Place your workpiece on the heat press platten, including any stuffing pads and fillers.
- Close the heat press until it latches shut.
- Turn the pressure knob clockwise until the workpiece is firmly compressed.
- Open the heat press.
- Turn the pressure knob another 1 full turn clockwise.
- Test out the clamping again, adjust the pressure knob in small increments to get the best fit.