Connecting to the Epilog Fusion Pro 36
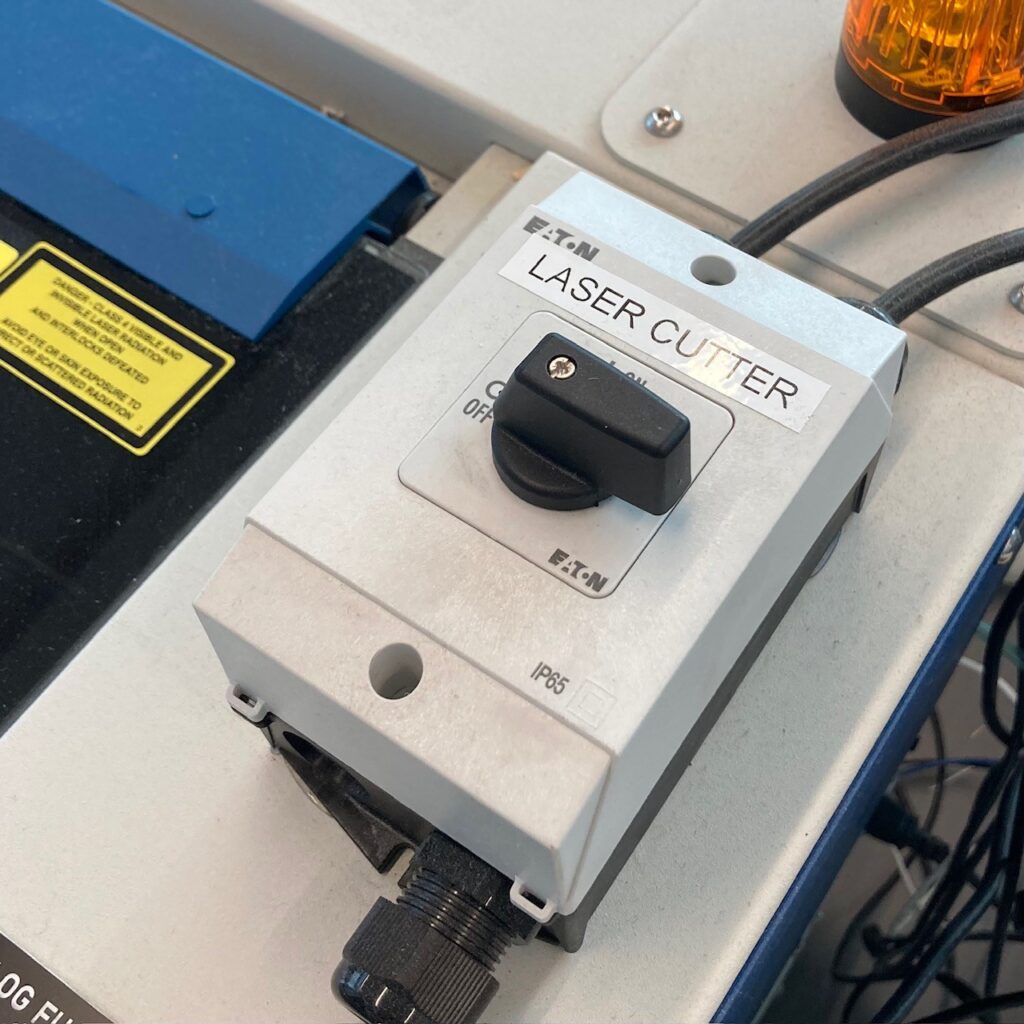
Turn the power switch for the laser cutter on. It’s the rotary switch on the top right of the laser cutter.
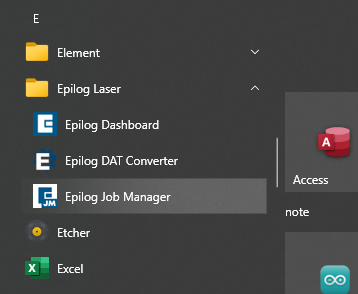
Open Epilog Job Manager from the Start Menu or the Desktop.
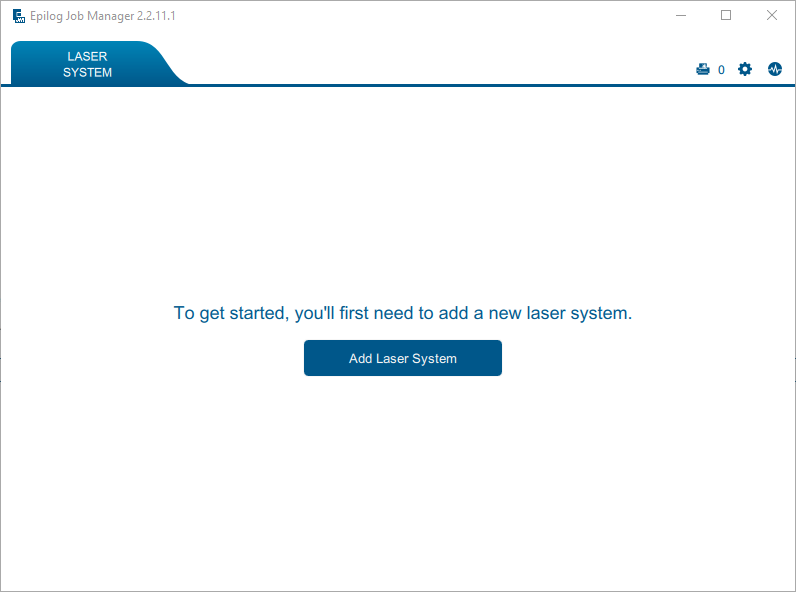
If the Fusion Pro 36 is listed as a laser then you are done – start laser cutting!
If the machine isn’t shown click on Add Laser System. This may be a large button with text in the centre of the screen, or a small plus icon in the top left.

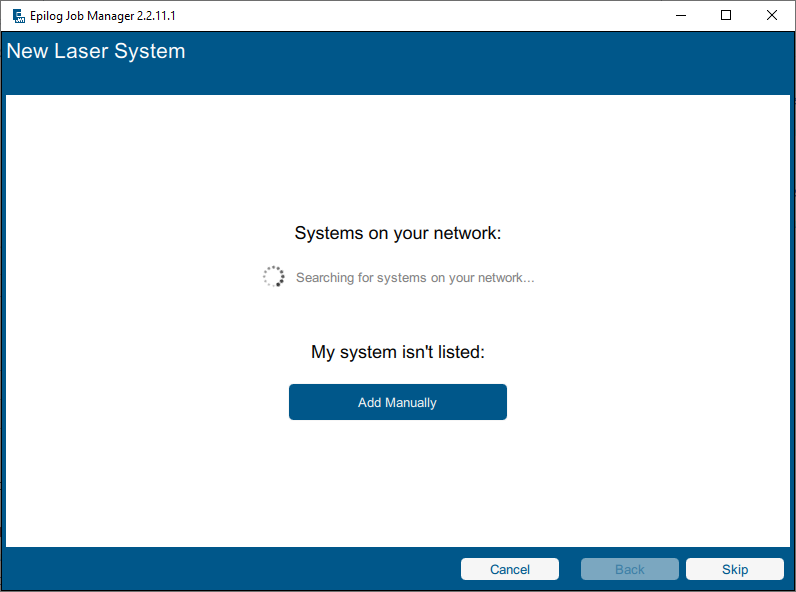
If the Fusion Pro 36 appears in the list under “Systems on your network” simply select and complete the wizard.
If it does not appear, click Add Manually.
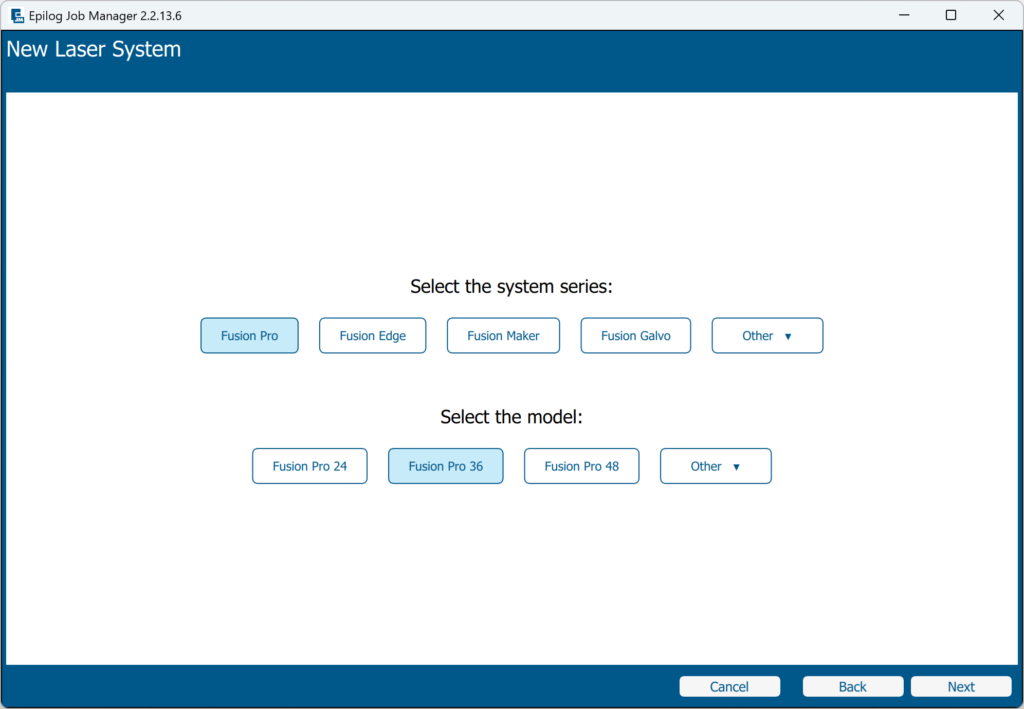
Select Fusion Pro as the system series, then Fusion Pro 36 as the laser model.
Click Next.
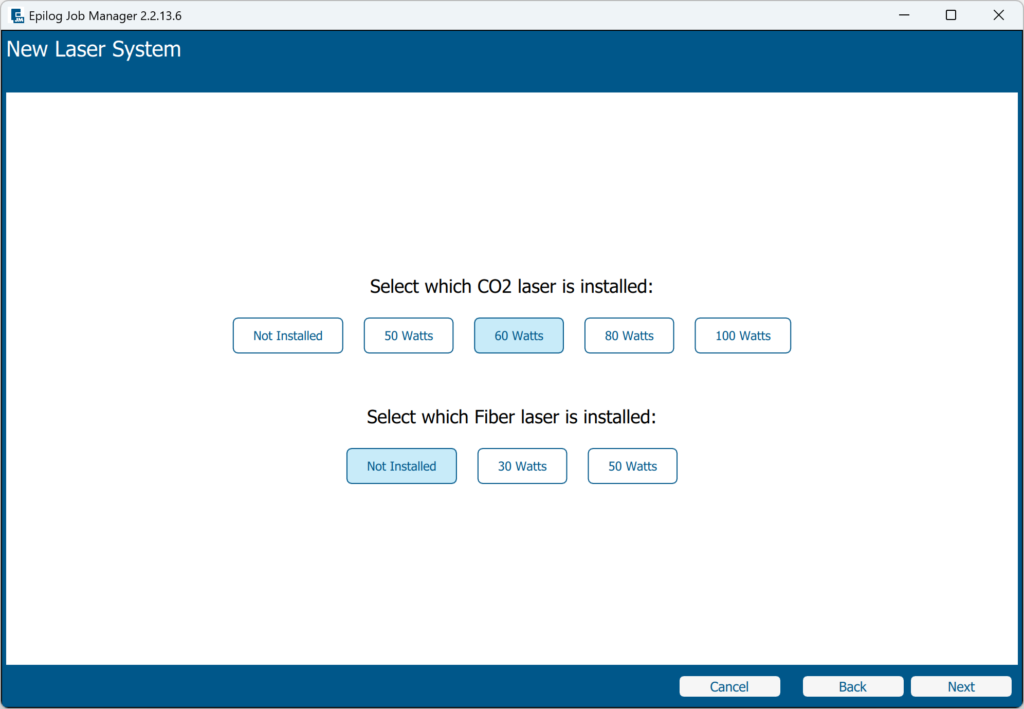
Select 60 watts for the CO2 laser tube option, and Not Installed for the fibre laser option.
Click Next.
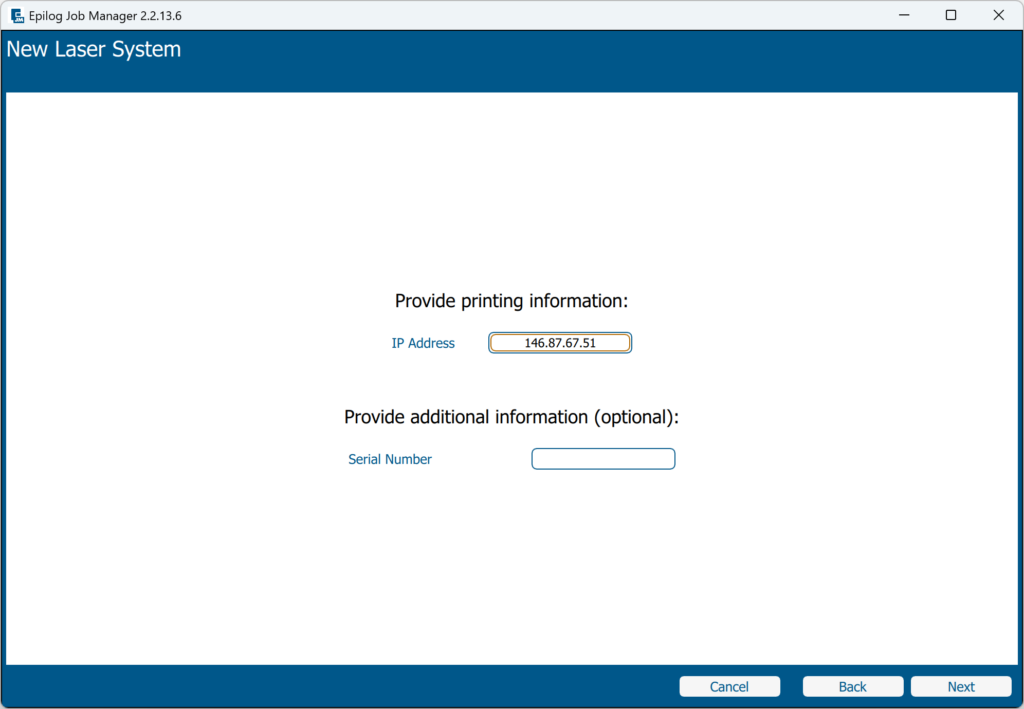
Enter the IP address 146.87.67.51 in the text box.
You do not need to enter a serial number.
Click Next.
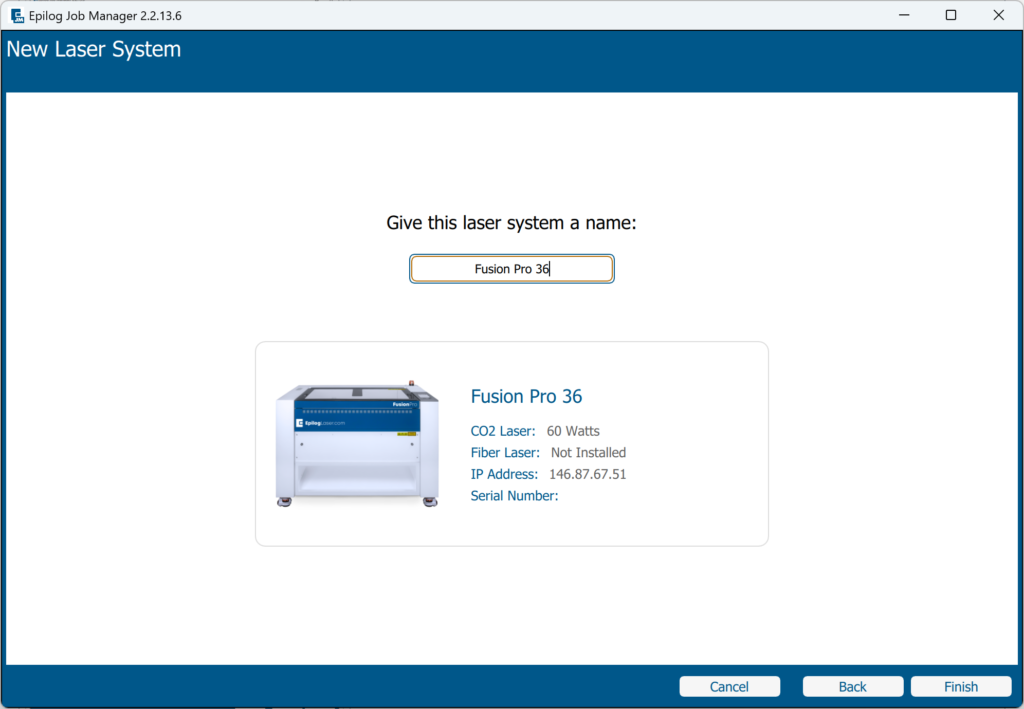
Give the machine the name Fusion Pro 36.
Click Finish, then close Epilog Job Manager. The laser is now installed and ready to use.